GitHub Signed Commits
When commiting code in git, the author details are taking from the git config of the user.name and user.email properties.
The
user.nameanduser.emailvariables determine what ends up in theauthorandcommitterfield of commit objects.
This then populates the git history, along with the commit message;
This is all well and good, however there is no verification behind this. It is possible to put any name in the config, and make it appear as though the commit has come from someone else. This is alluded to by the 'Unverified' flag next to the commit id, which is displayed as part of vigilante mode.
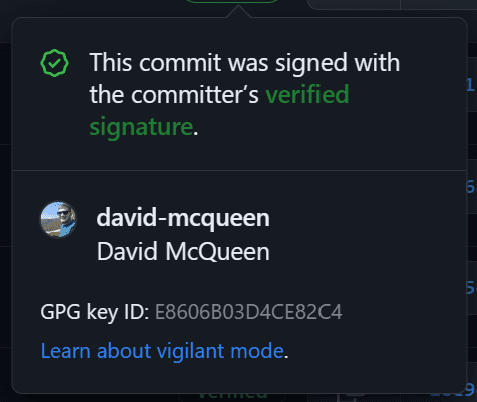
To help secure this, we can use Signed Commits. By creating a GPG key, we can use this to verify that the commit has come from the Github account that it says it has come from. The outcome from this will be that commits for that author will show as 'Verified'.
Setup
Note: This setup is focused on windows
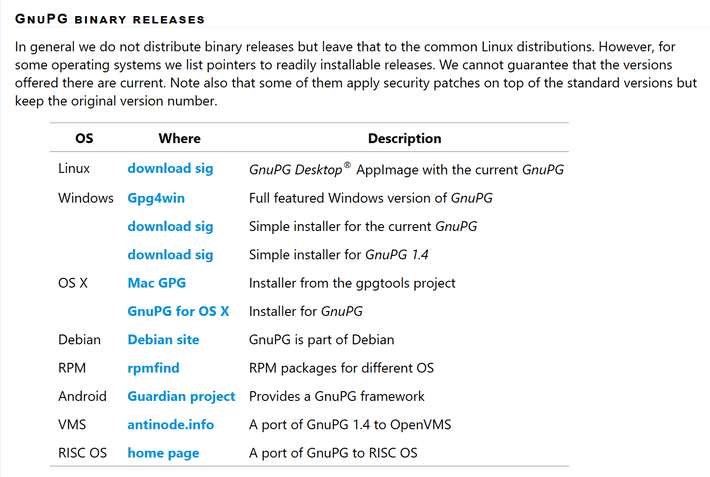
Download the binary release for the operating system.
Choose the appropriate download for your OS (in my case, Windows - Gpg4win). Once it has downloaded, run the installer.
After it has installed, we next need to generate a new key
Run gpg --full-generate-key in your terminal and follow the instructions. Further detail can be found on GitHub.
After you have a key, you next need to tell Git to use it when you perform a commit.
In order for GitHub to be able to verify that the commit came from the author who we say it did, we also need to tell GitHub about the key.
And as a final step, turn on Vigilant Mode.
With those steps complete, next time you do a commit and push it to GitHub, you should see that the commit has been verified.


